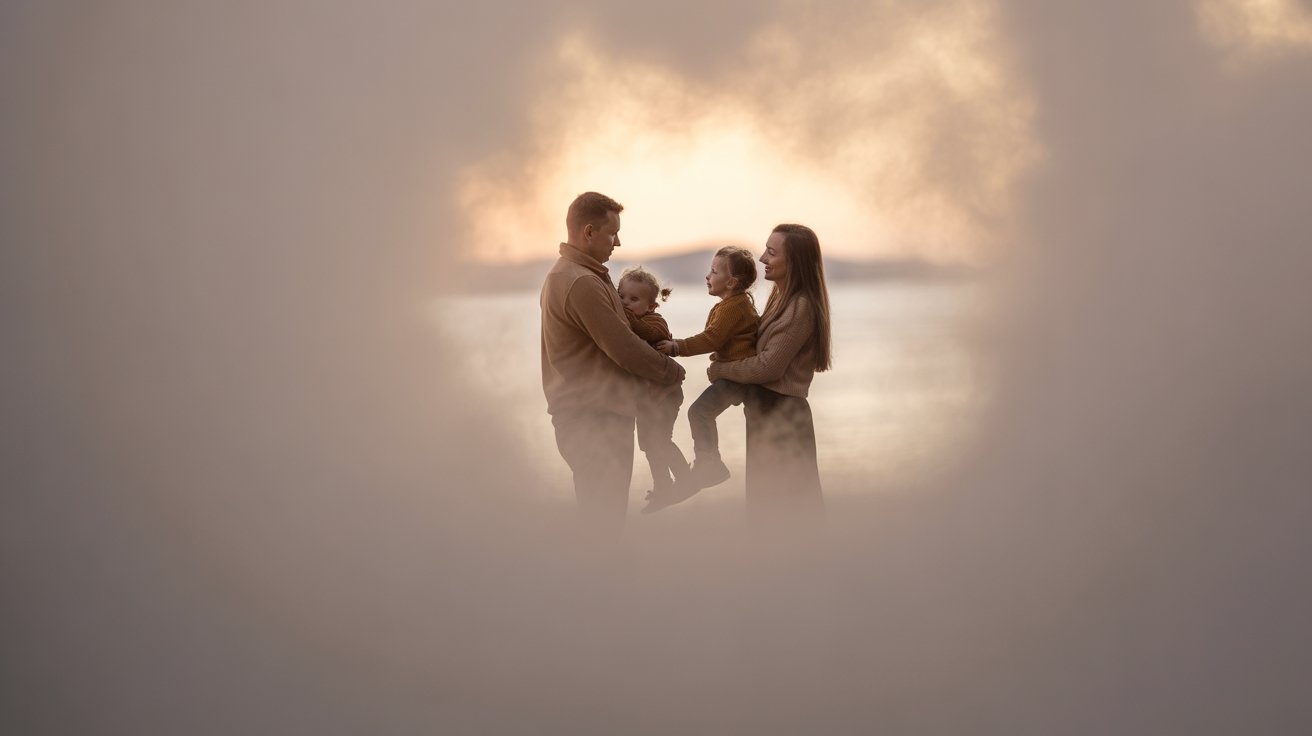
When photographer Annie Leibovitz captured that haunting family portrait in Maine’s coastal fog, she demonstrated how atmospheric conditions can transform ordinary portraits into cinematic masterpieces. You’ll need specific camera settings, proper safety gear, and precise positioning techniques to replicate this dramatic effect. Fog presents unique technical challenges that require manual focus adjustments and exposure compensation, but understanding these variables determines whether you’ll capture ethereal art or disappointing snapshots.
Understanding Different Types of Fog for Photography
When you’re planning fog photography sessions with your family, you’ll encounter four primary fog types that each require specific camera settings and safety precautions.
Radiation fog forms overnight in valleys, creating dense ground-level coverage that demands ISO 800-1600 and wider apertures.
Advection fog rolls inland from water bodies, offering dramatic backlit opportunities but requiring telephoto lenses for safe positioning.
Evaporation fog appears over warm water surfaces, providing ethereal effects best captured with fast shutter speeds of 1/250s or higher.
Steam fog occurs during temperature inversions, creating vertical wisps that need careful exposure metering.
Each type presents visibility challenges—maintain constant verbal contact with family members and establish clear boundary zones before shooting begins.
Essential Camera Settings for Foggy Conditions

Fog’s unique lighting conditions require specific camera adjustments that differ markedly from standard outdoor portrait settings.
You’ll need to compensate for fog’s light-diffusing properties by increasing ISO to 400-800, maintaining shutter speeds above 1/125s to prevent motion blur from restless children. Set your aperture between f/2.8-f/4 for sufficient depth of field while maximizing light intake.
Switch to manual focus since autofocus struggles in low-contrast foggy environments. Use your camera’s histogram to avoid underexposure—fog often tricks light meters into underexposing subjects.
Enable image stabilization and shoot in RAW format for maximum post-processing flexibility.
Monitor battery performance closely; cold, humid conditions drain power rapidly. Keep spare batteries warm in interior pockets.
Use lens hoods to prevent water droplets from accumulating on your front element, which can compromise image sharpness.
Best Times and Locations to Find Natural Fog

Although atmospheric conditions vary by region, you’ll maximize your chances of finding photographable fog by targeting specific times and locations where temperature differentials create perfect formation conditions.
Early morning hours between 30 minutes before sunrise and two hours after provide ideal density and lighting combinations. Scout valleys, lakeshores, and river corridors where warm water meets cool air masses. Coastal areas produce reliable marine layer fog during autumn months.
Monitor weather apps for overnight temperature drops of 15-20 degrees with high humidity readings above 85%. Always inform someone of your shooting location and carry emergency lighting equipment.
Park vehicles on stable ground away from roadways, and use reflective markers to maintain visibility around your photography setup during dense conditions.
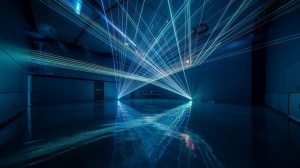
Creating Artificial Fog With Dry Ice and Fog Machines

Natural fog doesn’t always appear when you’ve planned a family photo session, making artificial fog generation a reliable alternative for achieving atmospheric effects.
Dry ice creates dense, low-lying fog when combined with warm water. You’ll need proper ventilation and insulated gloves—never handle dry ice directly. Use a 1:1 ratio of dry ice to warm water for ideal density. For significant fog production, consider using 5 pounds of dry ice in 4-5 gallons of hot water for a more dramatic effect.
Electric fog machines offer more control, producing consistent output through heated fog fluid. Position machines upwind from subjects, allowing 30 seconds for proper distribution. Monitor subjects for respiratory comfort, especially children.
Both methods require safety considerations: guarantee adequate airflow, keep dry ice away from children, and test fog density before positioning your family.
Positioning Your Family for Maximum Visual Impact

When positioning your family within artificial fog, you’ll need to contemplate both depth layering and light interaction to maximize visual drama.
Position taller subjects behind fog sources to create graduated silhouettes. Place children in front where fog naturally settles lower, ensuring their faces remain visible above the vapor line.
Use staggered positioning rather than linear arrangements—fog creates natural separation between subjects when they’re positioned at different distances from your lens.
Position key light sources 45 degrees behind subjects to create rim lighting through fog particles.
Monitor fog density continuously through your viewfinder. Reposition subjects immediately if fog concentration becomes too dense, obscuring facial features.
Maintain clear sight lines to all family members for safety. Keep backup positioning plans ready since fog dissipates unpredictably. Additionally, be aware that fog machines may trigger fire alarms due to smoke particles, so it’s wise to check the venue’s policies beforehand.
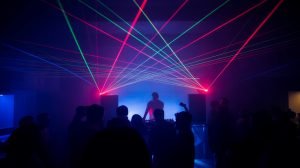
Working With Light Sources in Foggy Environments

Fog transforms light behavior dramatically, requiring specific technical adjustments to your lighting setup.
You’ll need to increase your flash power by 1-2 stops since fog scatters and absorbs light considerably. Position strobes closer to your subjects—within 6-8 feet maximum—to maintain effective illumination through the haze.
Backlit fog creates stunning rim lighting effects, so place one light source behind your family at a 45-degree angle. Use diffusers sparingly; fog already softens harsh shadows naturally. LED panels work exceptionally well for consistent output and battery conservation in cold, damp conditions.
Monitor your histogram closely—fog can trick your camera’s meter into underexposing. Bracket your shots and use manual exposure mode for consistency.
Keep backup batteries warm; cold fog environments drain power rapidly.
Safety Considerations When Photographing in Fog

Although fog creates ethereal photographic opportunities, it presents significant visibility and navigation hazards that require immediate attention to equipment protection and personal safety.
You’ll need waterproof lens covers and camera rain sleeves to prevent moisture damage to electronics. Keep lens cloths dry in sealed bags for frequent cleaning.
Establish clear boundaries with your family before shooting—fog reduces visibility to mere feet, making it easy to lose track of children or adults. Use flashlights or headlamps for navigation, not camera flashes which create dangerous glare.
Monitor weather conditions closely; fog often accompanies temperature drops and increased humidity. Wear appropriate footwear with good traction, as surfaces become slippery.
Always inform someone of your planned location and expected return time. Additionally, be aware that prolonged exposure to fog machine effects can lead to respiratory issues, so take breaks and ensure proper ventilation during your shoot.
Composition Techniques for Atmospheric Family Portraits

Since fog naturally creates depth and separation between visual elements, you’ll want to position your family members at varying distances from your camera to maximize the atmospheric layering effect.
Use wide apertures (f/1.4-f/2.8) to isolate subjects while maintaining the fog’s ethereal backdrop. Position your primary subject 8-12 feet from the camera, with secondary family members placed 15-25 feet behind them to create natural depth layers.
Essential composition techniques for emotional impact:
- Silhouette positioning against lighter fog patches for dramatic contrast
- Low-angle shots to emphasize fog rolling at ground level
- Backlighting through fog creates natural rim lighting on subjects
- Foreground elements like trees or rocks anchor the composition
- Leading lines formed by fog patterns guide viewers to your subjects
Monitor your histogram continuously—fog can fool your camera’s meter into underexposing darker subjects. Additionally, consider the impact of fog colors on your images, as they can evoke different emotions and enhance the overall mood.
Post-Processing Tips to Enhance Foggy Images

Capturing atmospheric family portraits in foggy conditions represents only half the creative process—your RAW files require specific post-processing techniques to maximize the ethereal qualities you’ve photographed.
Increase contrast selectively using luminosity masks to separate your subjects from the fog without crushing shadows. Boost clarity and texture on faces while reducing these settings on background fog to maintain softness.
Apply graduated filters to balance exposure between bright fog and darker subjects. Adjust white balance carefully—fog often creates cool color casts that may need warming.
Use the HSL panel to desaturate yellows and oranges in heavy fog for cleaner tones. Split-tone highlights toward blue-gray and shadows toward warm browns for cinematic depth.
Always work non-destructively with adjustment layers, and backup your RAW files before processing.
Troubleshooting Common Challenges in Fog Photography

When fog photography doesn’t deliver the results you’ve envisioned, specific technical issues typically cause the disappointment—and each requires targeted solutions.
Overexposed highlights destroy atmospheric depth when your camera’s meter reads fog as middle gray. Switch to spot metering and expose for skin tones instead. Autofocus hunting becomes problematic in low-contrast conditions—use single-point AF on high-contrast areas like clothing edges or facial features.
- Lost family connections when subjects disappear into dense fog banks
- Frustrated children waiting during extended setup times in cold, damp conditions
- Wasted travel efforts arriving at locations with insufficient atmospheric conditions
- Anxiety over equipment safety when moisture threatens expensive camera gear
- Missed emotional moments while struggling with technical camera adjustments
Use lens hoods and microfiber cloths frequently. Monitor histogram data constantly to prevent blown highlights. Additionally, be cautious of the health risks of inhaling fog generated by fog machines, especially in enclosed spaces.
Frequently Asked Questions
How Much Does It Cost to Rent Professional Fog Machines?
You’ll pay $50-150 daily for professional fog machines, depending on output capacity and features. Check voltage requirements, guarantee proper ventilation, and verify fluid compatibility. Higher-end models with DMX control cost more but offer precise density adjustment.
What Clothes Look Best on Families in Foggy Photo Shoots?
You’ll want solid, contrasting colors against fog’s white backdrop. Dark blues, blacks, and deep reds create striking silhouettes. Avoid busy patterns that’ll disappear in mist. Choose fitted clothing to maintain clear body definition through fog’s diffusion effects.
How Far in Advance Should I Book a Fog Photography Session?
You can’t catch fog like lightning in a bottle—it’s unpredictable. Book sessions flexibly, monitoring weather apps and fog forecasts closely. Allow 2-3 backup dates within your desired timeframe for ideal safety and equipment protection.
Do I Need Special Insurance When Using Fog Machines for Photos?
You’ll need liability coverage for fog machine operations. Check your existing policy’s exclusions for special effects equipment. Professional photographers often require additional coverage for artificial atmospheric effects and potential property damage from moisture or visibility reduction.
What Backup Plans Work if Natural Fog Doesn’t Appear as Expected?
You’ll need portable fog machines, reflectors for redirecting available light, and backup lighting equipment. Always test your fog machine’s output density beforehand, check wind conditions, and position safety equipment nearby for quick adjustments during shoots.
Conclusion
You’ll master fog photography’s technical demands while embracing its unpredictable beauty. Your precise camera settings—f/2.8 aperture, manual focus, adjusted ISO—create sharp portraits against nature’s soft veil. Where visibility drops to mere feet, your family’s connection becomes crystal clear. Safety protocols keep you grounded while creativity lifts your images skyward. The fog that obscures the world reveals your subjects’ true essence. Your technical expertise transforms nature’s ephemeral moment into your family’s eternal memory.