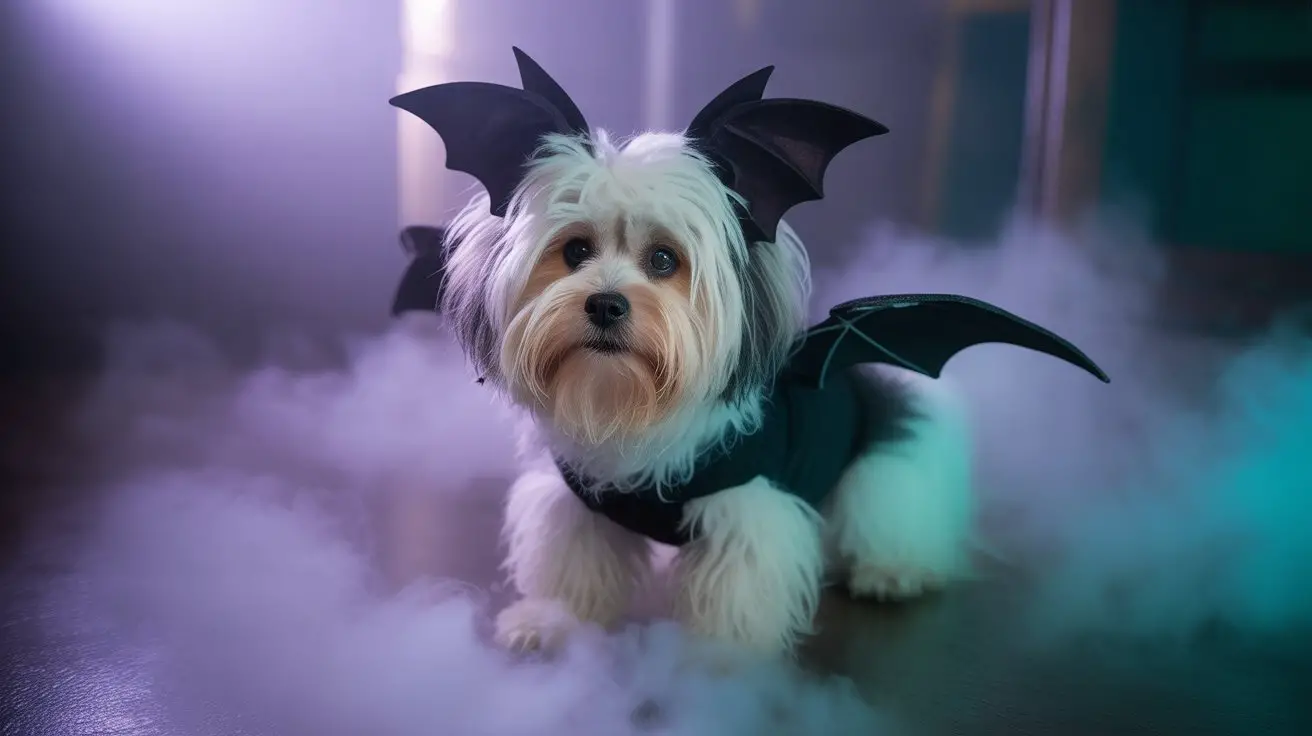
You’ve probably seen those stunning pet portraits where dogs and cats appear to emerge from mysterious, swirling mist, creating an almost otherworldly atmosphere. While these shots look complex, they’re entirely achievable with the right fog machine setup and technique. The key isn’t just adding fog randomly—it’s about understanding your equipment’s behavior, your pet’s comfort zones, and the precise timing that transforms ordinary portraits into enchanting art that’ll make clients wonder exactly how you captured such magic.
Choosing the Right Fog Machine for Pet Photography
Which fog machine will transform your pet portraits from ordinary to extraordinary?
You’ll need a low-lying fog machine that produces dense, controlled vapor without startling your furry subjects. Water-based fog machines are your safest bet—they’re pet-friendly and produce cooler vapor that won’t harm sensitive noses or paws.
Choose machines with variable output controls. You can’t predict when Rover will decide to bolt, so instant fog adjustment saves shots. Compact units work best for studio setups, while battery-powered options give you outdoor flexibility.
Avoid oil-based machines entirely—they’re toxic to pets and create respiratory irritation. Additionally, look for machines with built-in overheating protection to ensure safe extended use during your photoshoots.
Professional-grade water fog machines like the Antari F-80Z produce consistent results without the harsh chemicals that’ll send your subjects running for the hills.
Safety Considerations When Using Fog Around Animals

Your pet’s safety trumps any artistic vision, so understanding fog machine risks protects both your subjects and your reputation as a photographer.
Choose only water-based fog fluids—glycol-based options can irritate respiratory systems and cause allergic reactions in sensitive animals.
Test fog density beforehand; heavy concentrations restrict visibility and can trigger panic responses, especially in cats and small dogs.
Monitor your subjects constantly for stress signals: excessive panting, drooling, or attempts to flee.
Keep sessions brief—never exceed 10-minute intervals with fog present.
Guarantee adequate ventilation in your shooting space and position fog machines downwind from animals when possible.
Always have a well-ventilated escape route available.
Consider your pet’s health history; animals with respiratory conditions shouldn’t participate in fog photography sessions. Additionally, long-term exposure to fog machine mist can lead to serious respiratory issues, so it’s essential to take precautions.
Setting Up Your Fog Machine and Lighting Equipment

Once you’ve prioritized safety protocols, position your fog machine at least six feet from your pet to prevent direct exposure while maintaining atmospheric coverage. Place it slightly behind your subject to create depth without overwhelming the frame. Set your lighting equipment before activating fog—strobing lights can startle animals, and repositioning becomes challenging once fog fills the space. Use continuous LED panels or softboxes positioned at 45-degree angles to your pet. This creates natural-looking illumination while the fog acts as a diffuser. Keep your fog machine’s output low initially—you can always add more. Monitor your pet’s comfort level throughout setup. It’s important to ensure adequate air circulation in the area of use to prevent high concentration inhalation of fog effects. Test your lighting ratios before bringing your animal subject into the scene, ensuring proper exposure compensation for the fog’s light-scattering properties.
Techniques for Controlling Fog Density and Direction

Since fog behaves like a slow-moving liquid, you’ll need strategic air circulation to sculpt its movement around your pet’s silhouette.
Position low-speed fans at 45-degree angles to redirect fog flow without startling animals. Use barn doors or cardboard panels as vapor shields to contain density where needed.
Control output density through your machine’s settings and fluid mixture ratios. Thinner fluids create lighter haze, while glycol-based mixtures produce heavier, ground-hugging effects.
Pulse your machine in 3-5 second bursts rather than continuous operation—this prevents overwhelming nervous pets while maintaining workable atmosphere levels.
Watch your pet’s comfort indicators: excessive panting, restlessness, or hiding signals too much fog.
Always maintain clear escape routes and guarantee adequate ventilation between shots. Additionally, keep in mind how environmental conditions like humidity can affect fog density and behavior during your shoot.
Posing and Directing Pets During Fog Photography Sessions

While fog creates stunning atmospheric effects, it also changes your pet’s perception of their environment, requiring adjusted directing techniques to maintain natural poses.
You’ll need to modify your approach since pets rely heavily on visual cues that fog obscures. Work closer to your subject than usual, using vocal commands and treats positioned within their sight line.
Keep sessions shorter since fog can stress anxious animals. Position yourself where your pet can clearly see you, maintaining eye contact to provide reassurance. Additionally, be aware that fog machines can trigger fire alarms due to smoke particles, so it’s wise to check the venue’s policies beforehand.
- Use high-value treats to maintain focus through reduced visibility
- Keep commands simple and consistent throughout the session
- Position reflectors to create defined light paths your pet can follow
- Schedule breaks between fog bursts to reset your pet’s comfort level
- Have an assistant help guide pets from behind the fog wall
Frequently Asked Questions
How Do I Clean Fog Residue From My Camera Lens and Equipment?
You’ll need microfiber cloths and lens cleaning solution to gently remove fog residue. Don’t use harsh chemicals that might harm your furry subjects later. Clean in circular motions, working outward from center.
What’s the Best Time of Day for Outdoor Fog Photography Sessions?
You’ll capture stunning fog effects during golden hour when natural light diffuses beautifully through artificial fog. Early morning sessions work best since animals are typically calmer, more cooperative, and the cooler temperatures help fog linger longer.
How Much Does Professional Fog Machine Equipment Typically Cost?
You’ll spend $150-300 for entry-level units, while professional-grade machines cost $500-2000+. Budget extra for fog fluid refills and safety gear when working around animals who might be sensitive to atmospheric effects.
Can Fog Photography Work Well With All Dog Breeds and Sizes?
Like Goldilocks searching for “just right,” you’ll find fog works brilliantly with larger breeds who won’t spook, while smaller, anxious dogs often struggle with the mysterious swirling effects around them.
How Do I Edit Fog Effects in Post-Processing Software?
You’ll enhance fog effects using layer masks and opacity adjustments in Photoshop. Dodge and burn tools intensify dramatic lighting around your subject. Increase contrast selectively, then fine-tune saturation to make your pet’s coat pop against ethereal backgrounds.
Conclusion
You’ve mastered the magnificent methods for mesmerizing misty pet portraits. Remember to prioritize pet peace while pursuing perfect photographic pleasures. Monitor your furry friends for fearful feelings, and you’ll create enchanting, cloudy compositions that showcase their natural beauty. Trust your technical training, follow safety fundamentals, and let your creative control guide each session. With practice and patience, you’ll produce professionally polished pet portraits that perfectly blend atmospheric artistry with animal-friendly approaches for stunning, memorable results.